Author: geoff.vandermerwe@gmail.com

  • The Evolution and Future of Lager Yeast: A Brewmaster’s Perspective

    The Evolution and Future of Lager Yeast: A Brewmaster’s Perspective

    Introduction

    Lager yeast has long been the backbone of one of the most popular beer styles in the world. With its clean, crisp flavors and refreshing qualities, lagers have captivated beer drinkers for centuries. As the craft beer industry evolves, so too does the understanding and application of lager yeast. This post explores the brewing techniques, current trends, and future potentials of lager yeast, providing valuable insights for brewers and enthusiasts alike.

    The Science Behind Lager Yeast

    Lager yeast, primarily of the Saccharomyces pastorianus species, is known for its bottom-fermenting characteristics. Unlike its ale counterpart (Saccharomyces cerevisiae), lager yeast ferments at cooler temperatures, typically ranging between 45°F to 55°F (7°C to 13°C). This cooler fermentation process leads to the production of fewer esters and phenols, resulting in the clean, crisp profile that lagers are known for.

    Brewing Techniques for Lager Yeast

    To achieve the best results with lager yeast, brewers can employ several techniques:

    • Temperature Control: Maintaining a stable fermentation temperature is crucial for lager yeast. Fluctuations can lead to off-flavors. Employing temperature-controlled fermentation vessels can help achieve optimal results.
    • Lagering Phase: After primary fermentation, lagers benefit from an extended lagering phase at near-freezing temperatures. This maturation process smooths flavors and enhances clarity.
    • Oxygen Management: Like all yeast, lager yeast is sensitive to oxygen. Brewers should minimize exposure during transfers and packaging to prevent oxidation and off-flavors.

    Current Industry Trends

    As the craft beer movement continues to flourish, several trends are emerging in the use of lager yeast:

    Hybrid Yeasts

    Brewers are increasingly experimenting with hybrid yeasts that display characteristics of both ale and lager yeasts. These hybrids can ferment at higher temperatures while still offering the clean finish associated with lagers, providing brewers with more flexibility.

    New Strains and Varietals

    With advancements in yeast propagation and genetics, new lager yeast strains are being developed. These strains can enhance specific flavor profiles or reduce fermentation times, allowing for greater creativity in brewing.

    Cold IPAs and Other Innovations

    The rise of cold IPAs, which utilize lager yeast in combination with traditional IPA hops, is a prime example of innovation in the lager space. This style retains the hop-forward characteristics of IPAs while benefiting from the clean finish of lagers, appealing to a broader audience.

    Practical Tips for Homebrewers

    For homebrewers looking to explore lager yeast, consider the following tips:

    • Invest in Temperature Control: Whether through a fermentation chamber or temperature wraps, controlling temperature is key to successful lager brewing.
    • Be Patient: Lagers often require longer fermentation and conditioning times. Rushing the process can lead to undesirable flavors.
    • Experiment with Ingredients: Don’t hesitate to try different malt profiles, hops, and adjuncts to create unique lager styles.

    The Future of Lager Yeast

    Looking ahead, the future of lager yeast is bright. As technology continues to advance, brewers will have access to new yeast strains and fermentation techniques that can push the boundaries of traditional lagers. Additionally, the growing interest in sustainable brewing practices may lead to the discovery of local or wild lager yeasts that can contribute to distinctive regional flavors.

    Embracing Innovation

    Brewers are encouraged to embrace innovation while respecting the time-honored traditions of lager brewing. As the industry evolves, so too should our approach to lager yeast, blending science with creativity to produce exceptional beers.

    Conclusion

    Lager yeast remains a cornerstone of the brewing industry, and its future is filled with potential. By understanding the science behind lager yeast, leveraging current trends, and utilizing best practices, both professional brewers and homebrewers can create remarkable lagers that honor tradition while embracing innovation. As we look to the future, one thing is certain: the crisp, refreshing taste of lagers will continue to delight beer lovers around the globe.

  • Outrunning Worries and Chasing Beer on a Long Run: A Brewer’s Perspective

    Outrunning Worries and Chasing Beer on a Long Run: A Brewer’s Perspective

    Introduction

    As the sun rises and casts a golden hue over the open road, runners lace up their shoes, ready to chase their worries away with every stride. But what if the journey of running could be complemented with the rich, flavorful world of craft beer? As a brewing expert, I believe that the two can go hand-in-hand. This blog post will explore how the art of brewing, the science of running, and the joys of craft beer can intertwine to create a fulfilling experience.

    The Connection Between Running and Beer

    The connection between running and beer dates back centuries. In many cultures, beer was consumed as a form of hydration after physical exertion. Today, this tradition continues, but with a twist; craft breweries are beginning to cater to the running community by creating beers that complement the athletic lifestyle.

    Hydration and Recovery

    One of the most significant benefits of beer, when consumed in moderation, is its potential role in recovery. Post-run, many athletes find that a low-alcohol beer can serve as an excellent recovery drink due to its electrolyte content and carbohydrate levels.

    • Electrolytes: Beer contains essential electrolytes such as potassium, which can help in rehydration.
    • Carbohydrates: The simple sugars found in beer can replenish glycogen stores after long runs.

    Brewing Techniques for Runners

    Brewers are increasingly focusing on creating beers that appeal to health-conscious consumers, including runners. Here are some techniques that are gaining traction:

    • Session Beers: These beers are lower in alcohol (typically around 3-5% ABV) and are designed to be refreshing and drinkable. They allow runners to enjoy a beer without the heavy effects of higher alcohol content.
    • Dry Hopping: This technique adds hops during fermentation for a burst of flavor without adding additional bitterness. It can enhance the aromatic profile, making beers like IPAs particularly enjoyable after a long run.
    • Use of Local Ingredients: Many craft breweries are now sourcing ingredients locally, including grains and hops. This not only supports local agriculture but also provides fresher and more flavorful beers.

    Industry Insights: The Rise of Running Events at Breweries

    The craft beer industry has seen a significant trend in hosting running events at breweries. This fusion of fitness and beer culture has created a unique community that encourages people to engage in both activities.

    • Taproom Runs: Many breweries offer taproom runs, where participants can enjoy a run followed by a pint. These events foster community spirit and allow breweries to showcase their latest offerings.
    • Beer Miles: A growing trend among runners is the beer mile, which challenges participants to run a mile while consuming four beers. This fun, albeit challenging event, highlights the camaraderie between running and beer consumption.

    Practical Tips for Runners

    If you’re a runner looking to incorporate beer into your routine responsibly, here are some practical tips:

    • Choose Wisely: Opt for lighter beers with lower ABV to avoid dehydration and fatigue.
    • Timing is Everything: Enjoy your beer after your run, allowing your body to recover without the interference of alcohol during your workout.
    • Stay Hydrated: Always prioritize water intake before and after your run. Beer should be a treat, not a substitute for hydration.

    Conclusion

    Outrunning worries while chasing beer on a long run is not just a whimsical idea; it’s a lifestyle embraced by many fitness enthusiasts and craft beer lovers alike. By understanding the brewing techniques that cater to a healthier lifestyle and recognizing the growing trend of combining running with beer culture, we can appreciate how these two worlds can coexist harmoniously. So, the next time you hit the pavement, consider rewarding your efforts with a refreshing craft beer that complements your active lifestyle. Cheers to running and brewing responsibly!

  • Exploring Beachwood Brewing: Crafting Excellence in Every Sip

    Exploring Beachwood Brewing: Crafting Excellence in Every Sip

    Introduction

    In the vibrant landscape of American craft beer, few names resonate as powerfully as Beachwood Brewing. Established in 2011 in Long Beach, California, Beachwood has emerged as a beacon of innovation and quality in the brewing community. With a commitment to using the finest ingredients and pioneering brewing techniques, Beachwood Brewing not only satisfies the palate but also pushes the boundaries of what craft beer can be. In this post, we will delve into the brewing philosophy, techniques, and trends that define Beachwood Brewing and what sets it apart in the competitive craft beer scene.

    Brewing Philosophy: Quality Over Quantity

    Beachwood Brewing’s philosophy centers around the idea that quality should never be compromised for quantity. Founders Julian Shrago and Gabe Gordon are passionate about creating beers that speak to the craft beer lover’s soul. They emphasize traditional brewing methods while integrating modern techniques, resulting in a diverse range of brews that cater to a variety of tastes.

    Ingredient Integrity

    At Beachwood, the mantra is simple: use the best ingredients available. This commitment is reflected in their choice of hops, malts, and yeast. They source high-quality, often locally grown ingredients that enhance the flavor profiles of their beers. For instance, their use of California-grown hops not only supports local agriculture but also brings a unique freshness and character to their brews.

    Innovative Brewing Techniques

    Beachwood Brewing employs a range of innovative techniques that elevate their offerings. One notable method is their use of dry hopping, which involves adding hops at various stages during fermentation to enhance aroma and flavor without adding bitterness. This technique is evident in their flagship IPA, Amalgamator, which showcases vibrant hop characteristics while maintaining balance.

    A Diverse Beer Portfolio

    Beachwood Brewing’s portfolio is a testament to their versatility and creativity. From hop-forward IPAs to rich stouts, their range appeals to both casual drinkers and seasoned beer aficionados.

    Signature Beers

    • Amalgamator IPA – A West Coast IPA that features a blend of tropical and citrus hop aromas, balanced by a clean malt backbone.
    • Smokehouse Porter – This robust porter is infused with smoked malts, delivering a complex flavor profile that includes notes of chocolate and coffee.
    • Funky Blend Series – A rotating series of barrel-aged sour ales that showcase Beachwood’s adventurous spirit and dedication to experimentation.

    Current Trends in Craft Beer and Beachwood’s Response

    The craft beer industry is constantly evolving, and Beachwood Brewing has adeptly adapted to emerging trends. One significant trend is the rise of low-alcohol and sessionable beers. In response, Beachwood has introduced several lower ABV options that maintain flavor without overwhelming the drinker. Their Session IPA exemplifies this balance, providing hop intensity while remaining light and refreshing.

    Embracing Sustainability

    As environmental concerns continue to grow, many breweries are adopting sustainable practices. Beachwood Brewing is no exception, as they aim to minimize waste and energy consumption. Initiatives include:

    • Utilizing spent grain as animal feed for local farmers.
    • Implementing water-saving techniques during the brewing process.
    • Collaborating with local businesses to promote sustainability in the community.

    Practical Tips for Enjoying Beachwood Beers

    To fully experience the depth and complexity of Beachwood Brewing’s offerings, consider the following tips:

    • Glassware Matters: Use appropriate glassware to enhance the aroma and flavor. For IPAs, a tulip glass can concentrate hop aromas, while a snifter works well for stouts.
    • Food Pairings: Beachwood beers can complement a variety of dishes. Try their Smokehouse Porter with BBQ ribs or the Amalgamator IPA with spicy tacos.
    • Temperature Check: Serve beers at their optimal temperature to unlock their full potential. IPAs are best enjoyed slightly chilled, while stouts can be served at a warmer temperature for a richer flavor.

    Conclusion

    Beachwood Brewing stands as a testament to the art and science of craft brewing. With a dedication to quality, innovation, and sustainability, they continue to make waves in the craft beer industry. As they explore new flavors and techniques, Beachwood Brewing invites beer lovers to join them on an exciting journey of taste and creativity. Whether you’re a seasoned enthusiast or a casual drinker, there’s a Beachwood beer waiting to be discovered – each sip a reflection of their unwavering commitment to excellence.

  • Why More Drinkers Are Reaching for Non-Alcoholic Craft Beers

    The numbers don’t lie: non-alcoholic (NA) beer is having much more than a moment. According to the latest data from NIQ (formerly Nielsen), non-alcoholic beer saw a staggering 26.6% increase in dollar sales and 21.6% growth in volume over the past year. Meanwhile, traditional beer sales declined by 1% in dollars and 3.2% in volume during the same period.

    What was once a tiny, often-mocked segment of the beer market has transformed into one of its most dynamic and fastest-growing categories. But what’s driving this remarkable shift? Why are more drinkers than ever reaching for beers without the buzz?

    “We’re witnessing a fundamental change in how people think about drinking,” says beverage industry analyst Maria Cortez. “Non-alcoholic beer has shed its stigma and become a legitimate choice rather than a compromise.”

    This transformation didn’t happen overnight, nor is it driven by a single factor. Instead, it represents the convergence of several powerful trends that are reshaping not just beer, but our entire relationship with alcohol. For brewers and homebrewers alike, understanding this shift is crucial.

    The Numbers Don’t Lie

    Various non-alcoholic craft beers in glasses

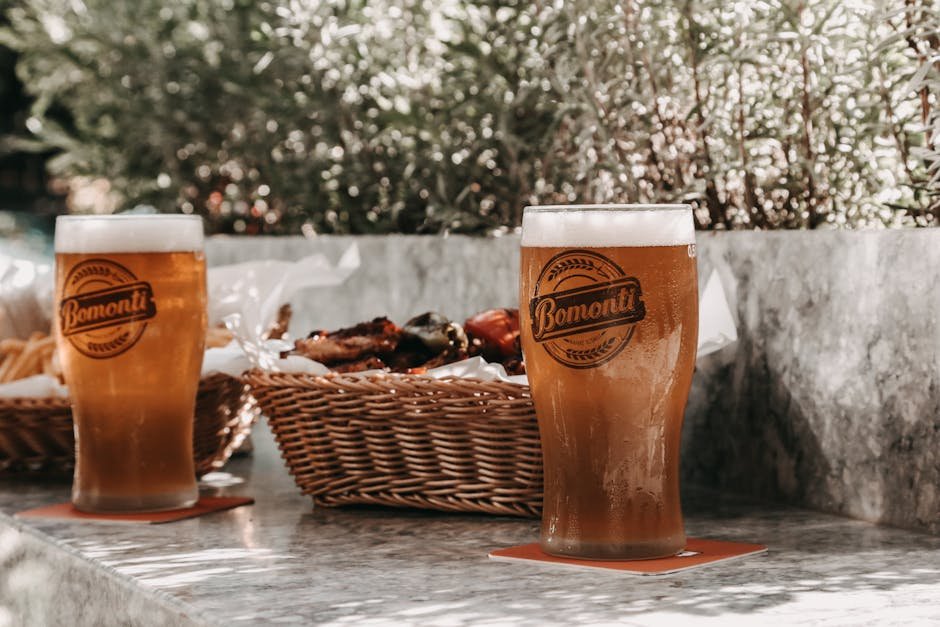
    The growing variety of non-alcoholic craft beers offers flavorful alternatives for mindful drinkers

    The growth of non-alcoholic beer is particularly impressive when viewed against the backdrop of the broader beer market. While overall beer sales have been flat or declining for several years, non-alcoholic options continue to surge.

    According to data from IWSR, a leading beverage alcohol insight firm, the no- and low-alcohol market is expected to expand by over 4% in volume compound annual growth rate through 2028 across ten key global markets. Non-alcoholic RTDs (ready-to-drink beverages) are predicted to grow at the fastest rate during this period.

    This growth isn’t limited to a single demographic. While millennials and Gen Z are often credited with driving the trend, research shows that health-conscious Gen X and Baby Boomers are also significant consumers of non-alcoholic beer.

    “What’s particularly interesting is the purchasing patterns we’re seeing,” notes retail analyst James Wilson. “Many consumers are buying both alcoholic and non-alcoholic options, suggesting they’re not giving up alcohol entirely but are being more intentional about when and how much they consume.”

    This “both/and” approach is reflected in sales data showing that over 80% of non-alcoholic beer purchasers also buy traditional beer. Rather than representing a complete shift away from alcohol, the trend indicates a more nuanced approach to drinking.

    Quality Revolution

    Perhaps the most significant factor driving non-alcoholic beer’s growth is simple: it tastes good now. Really good.

    “The quality improvement in non-alcoholic beer over the past five years has been nothing short of revolutionary,” says certified beer judge and author Samantha Chen. “We’ve gone from thin, watery approximations of beer to products that can stand alongside traditional craft offerings in blind tastings.”

    This quality leap stems from significant advances in brewing technology and techniques. Traditional methods for producing non-alcoholic beer often involved either halting fermentation before much alcohol was produced (resulting in sweet, unbalanced beer often lacking complexity) or removing alcohol after brewing (often stripping away flavor compounds in the process). Mastering fermentation is key, and even homebrewers utilize specialized gear like a FASTFERMENT 3 Gallon Conical to achieve precise results, mirroring the control needed at larger scales.

    Today’s craft non-alcoholic brewers employ more sophisticated approaches. Some use special yeast strains that produce minimal alcohol. Others use vacuum distillation that removes alcohol at lower temperatures, preserving delicate flavors. Still others use reverse osmosis or dialysis to separate alcohol molecules while retaining flavor compounds.

    Athletic Brewing Company, which made history by winning Large Brewery of the Year at the 2025 Best of Craft Beer Awards, uses a proprietary brewing process specifically designed for non-alcoholic beer rather than adapting traditional methods.

    “We’re not making beer and then removing the alcohol,” explains Athletic Brewing founder Bill Shufelt. “We’re brewing specifically to create great flavor without producing much alcohol in the first place.”

    For home brewing enthusiasts interested in the science behind these techniques, understanding the fundamentals of wort production, fermentation, and ingredient interaction is crucial. Getting hands-on experience with a kit like the Northern Brewer HomeBrewing Starter Set provides an excellent foundation for appreciating the brewing process, whether you aim for alcoholic or non-alcoholic results.

    The Sober Curious Movement

    Beyond quality improvements, non-alcoholic beer’s rise is closely tied to the growing “sober curious” movement—a term coined by author Ruby Warrington to describe those questioning their relationship with alcohol without necessarily identifying as having a dependency issue.

    This movement represents a broader cultural shift toward mindful consumption. Rather than drinking alcohol by default, more people are actively considering whether, when, and how much to drink based on how it affects their physical and mental wellbeing.

    Social media has played a significant role in normalizing and spreading this approach. Hashtags like #SoberCurious and #MindfulDrinking have millions of posts across platforms, while challenges like Dry January and Sober October have become mainstream annual events rather than niche undertakings.

    “What’s powerful about the sober curious movement is that it removes the binary thinking around alcohol,” explains wellness coach Taylor Rodriguez. “It’s not about never drinking versus drinking whatever, whenever. It’s about being intentional and having quality options regardless of your choice.”

    Celebrities and influencers have also helped drive the trend. Athletes like NFL star Tom Brady and NBA player Steph Curry have been open about limiting or avoiding alcohol to optimize performance. Actors including Blake Lively, Katy Perry, and Brad Pitt have launched non-alcoholic beverage brands, helping to position alcohol-free options as aspirational rather than punitive.

    Health and Wellness Driving Choices

    The sober curious movement is itself part of a broader wellness trend that has consumers increasingly focused on how their consumption habits affect their physical and mental health.

    “The pandemic really accelerated this trend,” notes health researcher Dr. James Liu. “As people became more attuned to their health, many started questioning habits they’d previously taken for granted, including regular alcohol consumption.”

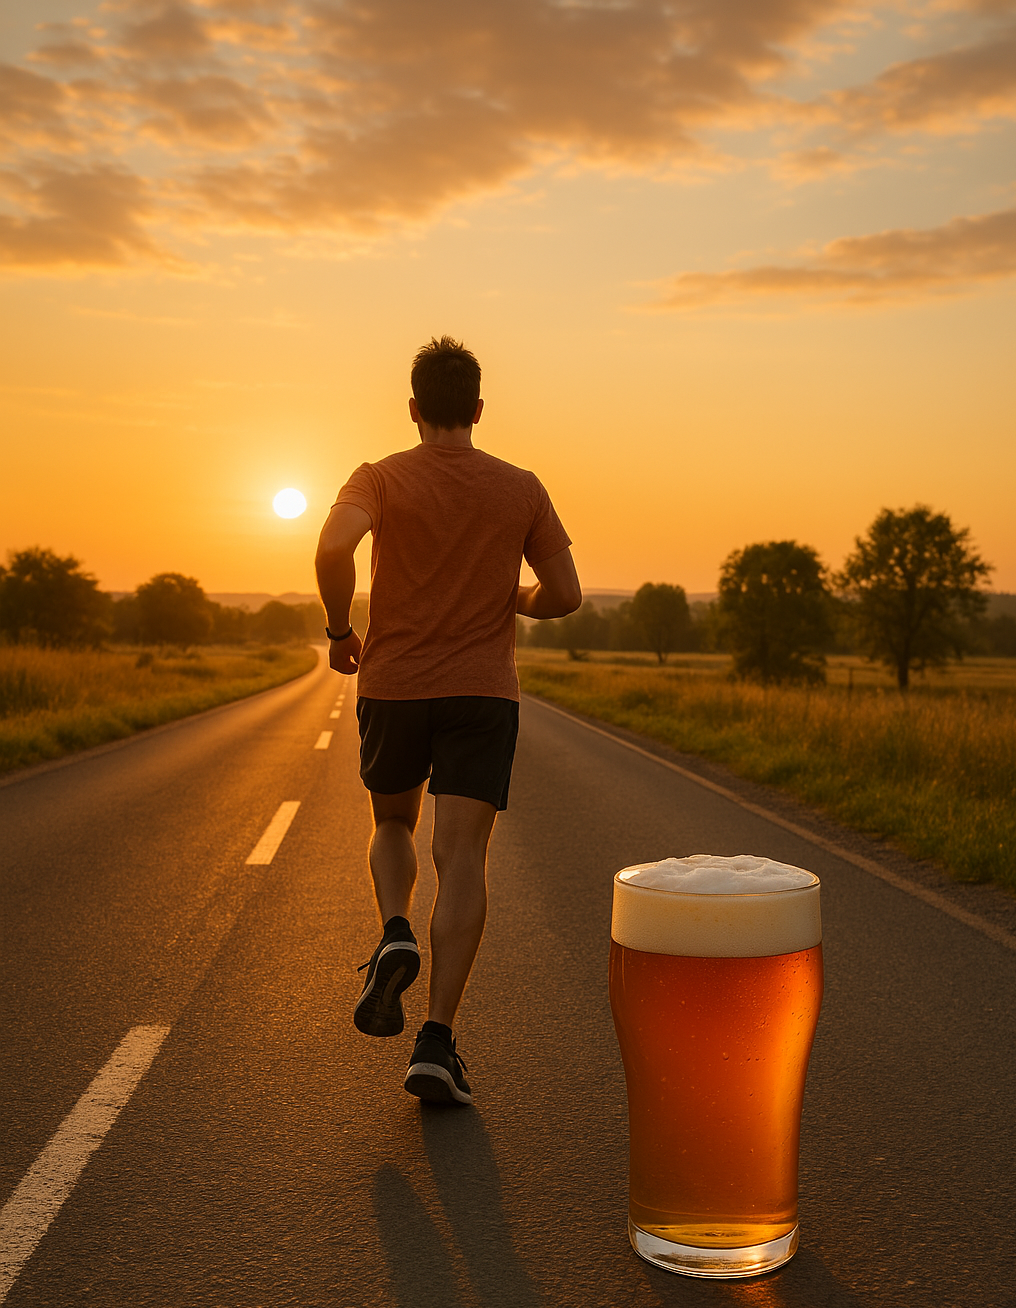
    Research has linked even moderate alcohol consumption to increased cancer risk, sleep disruption, anxiety, and other health concerns. Meanwhile, the fitness boom has many people unwilling to sacrifice their morning workout for a night of drinking.

    Non-alcoholic beer offers a compelling alternative. Most contain fewer calories than their alcoholic counterparts—typically 50-100 calories per can versus 150-200 for regular beer. They don’t cause dehydration, don’t interfere with sleep quality, and don’t impair physical recovery after exercise. Understanding the ingredients and process allows for better choices, whether buying commercially or brewing at home. Brewing your own gives you ultimate control, and starting with something like the Craft A Brew Home Brewing Kit offers an accessible entry point to learn how ingredients like malt and hops translate to the final product’s characteristics, including calories and body.

    Some non-alcoholic beers even position themselves as functional beverages. Athletic Brewing, for instance, highlights that their beers contain beneficial compounds from hops and grains without alcohol’s drawbacks.

    Top Non-Alcoholic Beers Worth Trying

    The explosion in quality and variety means there’s likely a non-alcoholic beer to match almost any preference. Here are some standouts from the 2025 awards circuit and beyond:

    • Athletic Brewing Run Wild IPA: A gold medal winner at the 2025 Best of Craft Beer Awards, this West Coast-style IPA delivers authentic hop bitterness and aroma with notes of pine and citrus.
    • Athletic Brewing Free Wave Hazy IPA: This bronze medal winner offers a juicy, tropical take on the hazy IPA style with less bitterness and more fruit-forward hop character.
    • Sierra Nevada Trail Pass Hazy IPA: Using a new hybrid yeast strain that produces minimal alcohol, this recent release captures Sierra Nevada’s hop expertise in a non-alcoholic format.
    • Heineken 0.0: One of the most widely available and consistently high-quality options from a major brewery, offering clean lager flavor that closely matches the original.
    • Athletic Brewing Raspberry Espresso Stout: A gold medal winner that proves non-alcoholic beer can deliver complex, rich flavors beyond just hop-forward styles.
    • Grüvi Imperial Dawn IPA: This innovative offering tackles the challenging imperial IPA style in non-alcoholic form, delivering surprising body and hop intensity.
    • Best Day Brewing Electro Lim: A silver medal winner with bright citrus notes that make it particularly refreshing.
    • Deschutes Fresh-Squeezed Nonalcoholic IPA: This non-alcoholic version of Deschutes’ popular IPA earned a silver medal for its faithful recreation of the original’s citrus-forward hop profile.

    Exploring the brewing science that makes these exceptional NA beers possible is fascinating. Foundational texts like The Complete Joy of Homebrewing by Charlie Papazian provide valuable insights into the core principles of brewing that underpin both traditional and non-alcoholic beer production, explaining how brewers achieve specific flavors and characteristics.

    The Future Is Choice

    The rise of non-alcoholic beer represents something more significant than just a trend—it signals a fundamental shift in how we think about drinking. Rather than alcohol being the default and abstention the exception that requires explanation, we’re moving toward a culture where either choice is equally valid and well-supported.

    “What we’re seeing is the normalization of choice,” says cultural anthropologist Dr. Maya Patel. “The question is no longer ‘Why aren’t you drinking?’ but ‘What are you drinking?’ with no judgment attached to the answer.”

    This shift benefits everyone. Those who choose not to drink alcohol—whether for a night, a month, or forever—now have options that deliver genuine flavor and craft credentials. Those who do drink alcohol can practice moderation more easily with high-quality alternatives for occasions when they prefer not to consume alcohol.

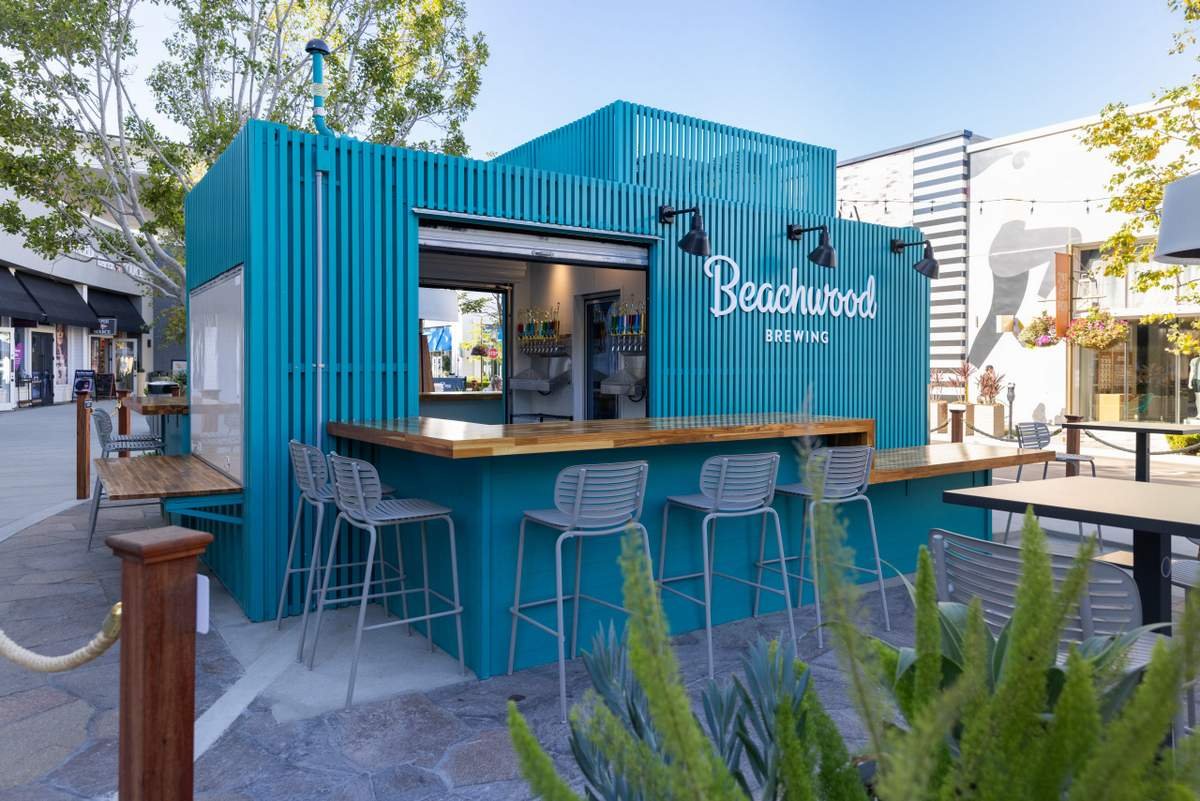
    Breweries are responding to this new paradigm by expanding their offerings. Major craft brewers like Sierra Nevada, Samuel Adams, and Brooklyn Brewery have all launched non-alcoholic lines, while dedicated non-alcoholic producers like Athletic Brewing continue to grow and innovate. For the dedicated homebrewer looking to experiment or replicate styles, understanding process control is paramount, often involving precise temperature management achieved with tools like a dependable Digital Pocket Thermometer.

    As brewing technology continues to advance and consumer acceptance grows, we can expect non-alcoholic beer to become an increasingly important part of the craft beer landscape—not as a separate category, but as an integrated part of the broader beer world.

    The message is clear: non-alcoholic beer is no longer just for those who can’t drink alcohol. It’s for anyone who loves beer and wants more choices about when, where, and how they enjoy it.


    What Makes a Great Non-Alcoholic Beer?

    • Flavor authenticity: The best non-alcoholic beers deliver the same flavor complexity as their alcoholic counterparts, with balanced malt, hop, and yeast characteristics.
    • Body and mouthfeel: Quality non-alcoholic beers overcome the watery texture that plagued earlier examples, achieving satisfying body through brewing techniques and ingredients like oats, wheat, and specialty malts.
    • Aroma: Great non-alcoholic beers offer the same enticing aromas as traditional beer, particularly important for hop-forward styles where aroma is a key component of the experience. Capturing hop aroma often involves techniques like dry hopping, where tools like a Stainless Steel Hop Spider can be useful even at the homebrew scale.
    • Finish: Rather than a quick, flat finish, the best non-alcoholic beers have a lingering, clean conclusion that invites another sip.
    • Evaluation approach: Judge non-alcoholic beers on their own merits rather than as direct comparisons to alcoholic versions. The best examples stand as excellent beverages in their own right, not just as “good for non-alcoholic beer.”

    (Disclaimer: As an Amazon Associate, I earn from qualifying purchases. The links included in this article are affiliate links, meaning I may receive a small commission if you purchase through them, at no extra cost to you.)


  • How to Brew an Authentic 19th Century American Cream Ale: A Step-by-Step Guide

    Section 1: Introduction: Stepping Back into American Brewing History

    Forget the often mild-mannered, subtly sweet Cream Ale you might find on tap today. While pleasant, it’s often a shadow of its more robust ancestor. Ready to brew something different? Let’s fire up the kettle and craft a taste of true 19th-century American ingenuity!

    We’re talking about the original American Cream Ale – a fascinating style born in the bustling breweries of the 1800s. This wasn’t just another pale ale; it was a distinctly American creation, forged in the competitive fires of a rapidly changing brewing landscape. Think of it as an ale, but one designed with the crispness and pale allure of the popular lagers that were capturing the nation’s thirst. It stands apart not only from modern interpretations but also from its contemporary lager cousins it sought to emulate.

    Why did this style even come about? Imagine the scene: traditional ale brewers, steeped in English techniques, were watching the crisp, clean, golden lagers brought over by German immigrants gain massive popularity. Their answer? Cream Ale – a clever attempt to brew an ale that could compete on lightness, clarity, and refreshment, often using unique American ingredients like corn or rice to achieve that goal. It’s a snapshot of American resourcefulness in a glass.

    In this guide, we’ll journey back to uncover the secrets of this near-forgotten style. You’ll learn about its unique place in brewing history, discover the specific ingredients that gave it its character, and most importantly, follow a detailed, step-by-step process to brew an authentic batch of 19th Century American Cream Ale right in your own home brewery. Let’s brew some history!

    Section 2: A Glimpse into the Past: The Birth of Cream Ale

    To truly appreciate the Cream Ale we’re brewing, let’s briefly step back into the era of its creation. Picture the American brewing scene in the mid-to-late 19th century, particularly in bustling areas like the Northeastern United States. This was a time of significant change and fierce competition.

    For decades, American brewers had primarily followed English traditions, producing ales – often darker, fruitier, and served warmer. But a wave of German immigration brought with it a new and wildly popular style: lager. These beers were pale, crisp, clean-finishing, and served cold. They quickly captured the public’s imagination and palate, putting immense pressure on established ale breweries.

    Faced with this lager revolution, American ale brewers needed to adapt or risk becoming obsolete. They couldn’t easily replicate the complex, cold-fermentation process of lagers without significant investment in equipment and ice (a major expense back then!). Instead, they got inventive. Cream Ale emerged directly from this competitive pressure – it was the ale brewers’ strategic response.

    Their goal was clear: create an ale that possessed the desirable qualities of a lager. They aimed for a beer with a pale golden color, a lighter body than typical ales, and a crisp, refreshing finish. To achieve this, they often turned to readily available North American ingredients, most notably adjuncts like corn and rice, which helped lighten the beer’s character and color while also being economical. This innovative approach resulted in a uniquely American style, born from necessity and ingenuity.

    Section 3: Understanding the 19th Century Cream Ale Style

    So, what should you expect when you finally pour a glass of this historical brew? While individual recipes varied, the goal was consistently a beer that presented as a lighter, crisper alternative to traditional ales, closely mimicking the popular lagers of the day.

    Expected Flavor Profile:

    • Malt: Don’t expect a big malt backbone here. The flavor should be generally light and subtle, with a delicate graininess often coming from the North American 6-row barley used at the time. If corn or rice adjuncts were used (which was common), you might perceive a very faint sweetness or a slight corn-like note, but it shouldn’t be dominant. Critically, ester production (fruity flavors common in many ales) should be very low, contributing to a cleaner profile.
    • Hops: Hop character takes a backseat. Bitterness will be present but restrained, ranging from low to moderate (think 15-25 IBUs) – just enough to balance any slight malt sweetness and provide a refreshing quality. Hop flavor and aroma should be minimal to non-existent, aligning with the goal of creating a lager-like ale.
    • Finish: This is where the style aimed to shine. Expect a crisp, clean, and well-attenuated finish. The beer should feel refreshing and relatively dry on the palate, encouraging another sip.

    Appearance:

    • Color: Visually, 19th Century Cream Ale aimed to compete directly with pale lagers. Expect a color ranging from pale straw to light gold (roughly 2-5 on the Standard Reference Method or SRM scale).
    • Clarity: Achieving brilliant clarity was a key objective. Historical brewers likely went to great lengths (including potentially cold conditioning or ‘lagering’) to produce a bright, clear beer, free from the haze sometimes associated with ales.

    Key Differences from Modern Cream Ale:

    It’s important to distinguish this historical version from many modern craft or macro examples labeled “Cream Ale.” Today’s versions are often smoother, sometimes slightly sweeter, might use different base malts (like 2-row), potentially different hop varieties, and are sometimes fermented even cleaner or colder. The historical version often had a bit more character from the 6-row malt and corn/rice adjuncts, used specific historical hop varieties like Cluster, and the exact yeast character could vary depending on the brewer’s methods (aiming for clean, but perhaps not always achieving the ultra-clean profile of modern techniques). The emphasis was squarely on being an ale that successfully mimicked a lager using the technology and ingredients of the time.

    Section 4: Gathering Your Historical Ingredients & Gear

    Brewing an authentic 19th Century Cream Ale requires careful consideration of your ingredients. While we can’t perfectly replicate the exact malts or hops from 150 years ago, we can make informed choices based on historical records and brewing practices of the era.

    Malts:

    • Base Malt: North American 6-Row Pale Malt: This was the workhorse malt for many American brewers in the 19th century. Compared to modern 2-row, it typically has higher protein and enzyme content and can contribute a slightly more grainy or husky flavor, which is characteristic of the historical style. If you can source it, use it!
      • Readily Available Substitute: If 6-row is hard to find, North American 2-Row Pale Malt is a perfectly acceptable substitute and will still produce a great beer.
    • Specialty Malts: Keep these to a minimum, or omit them entirely for maximum authenticity. The goal was pale color and light flavor, not complex malt profiles. Avoid crystal/caramel malts.

    Adjuncts (The Secret Weapon):

    • Why Adjuncts? Corn and rice were key ingredients! They were plentiful and cheaper than barley malt in North America. Crucially, they helped brewers achieve the light body, pale color, and crisp finish needed to compete with lagers. Using adjuncts is non-negotiable for historical accuracy.
    • Your Options:
      • Flaked Maize (Corn): This is the easiest and most common choice for modern homebrewers. It’s pre-gelatinized, meaning you can add it directly to your mash with the base malt.
      • Corn Grits: More traditional, but requires an extra step called a ‘cereal mash’ (boiling the grits, usually with a small amount of malted barley, before adding to the main mash) to gelatinize the starches.
      • Flaked Rice: Another historically accurate option, works similarly to flaked maize (add directly to the mash). It tends to contribute an even lighter, drier character than corn.
    • How Much? Aim for adjuncts to make up 15% to 30% of your total grain bill.

    Hops (Keeping it Subtle):

    • Historical Varieties:
      • Cluster: This is widely considered the quintessential American hop of the era and your primary choice. It provides a straightforward, somewhat pungent bitterness.
      • Other Possibilities: Depending on the specific time and brewer, some German noble hops (Hallertau, Saaz) might have been used sparingly, or other older American varieties if available, though Cluster is the safest bet for general authenticity.
    • Usage & Bitterness: Remember, hop flavor and aroma were not the goals.
      • IBU Target: Aim low, typically between 15 and 25 IBUs.
      • Timing: Most, if not all, of your hops should be added early in the boil (e.g., at 60 minutes) purely for bittering. Avoid significant late additions (flavor/aroma hops).

    Yeast (The Great Debate):

    • The Historical Puzzle: Brewing records from the 19th century are sometimes ambiguous. Was Cream Ale fermented with ale yeast, lager yeast, or even a mix? Evidence suggests brewers experimented, often using their house ale strains but trying techniques (like cooler fermentation or cold storage) to mimic lager characteristics. Some may have obtained lager yeast and fermented it warmer than traditional lager temperatures.
    • Modern Choices for a Clean, Historical Profile: The key is choosing a yeast strain and fermentation temperature that minimizes fruity esters and produces a clean, crisp beer:
      • Clean American Ale Yeast: Strains like Wyeast 1056 American Ale™, White Labs WLP001 California Ale Yeast®, or SafAle US-05 are excellent choices. The trick is to ferment them at the cool end of their recommended temperature range (e.g., 60-65°F / 15-18°C).
      • Kölsch Yeast: Strains like Wyeast 2565 Kölsch™ or White Labs WLP029 German Ale/Kölsch Yeast are known for producing very clean, lager-like ales, making them a great fit. Ferment within their recommended range.
      • Lager Yeast (Used Differently): You could use a versatile lager strain like Wyeast 2124 Bohemian Lager™ or SafLager W-34/70. However, instead of a true cold lager fermentation, you might ferment it slightly warmer than typical lager temps (a “pseudo-lager” approach, e.g., 55-60°F / 13-15°C) or perform a standard cool lager fermentation followed by lagering. Our step-by-step recipe will specify a recommended yeast type and fermentation profile.

    Water Profile:

    • Keep it Simple: Historical Cream Ales were likely brewed with the local water, which varied. Generally, water that is soft to moderately hard works well. Extremely hard or mineral-heavy water should be avoided.
    • Practical Advice: Unless your water is known to be problematic, clean, filtered tap water is often sufficient. If you build water from scratch using Reverse Osmosis (RO) or distilled water, aim for a simple profile with modest amounts of Gypsum (for sulfate) and Calcium Chloride (for chloride) to support yeast health and a slightly crisper finish.

    Standard Homebrew Equipment:

    You likely already have everything you need:

    • Mash Tun (for all-grain/partial mash)
    • Brew Kettle
    • Fermenter (bucket or carboy)
    • Airlock
    • Hydrometer & Test Jar (for measuring gravity)
    • Thermometer (Accurate!)
    • Sanitizer (Star San, Iodophor, etc. – Crucial!)
    • Siphon/Tubing
    • Bottling Bucket & Bottling Wand OR Kegging System
    • Highlight – Temperature Control: Because achieving a clean fermentation profile is critical, having a way to control your fermentation temperature (e.g., a temperature-controlled chamber/fridge, or even a simple swamp cooler setup) is highly recommended for this style.

    Section 5: Brewing Your 19th Century Cream Ale: Step-by-Step Guide

    Now that you’ve gathered your historically-inspired ingredients and gear, it’s time to brew! This section will walk you through the process from mashing to fermentation. We’ll provide both an All-Grain recipe for those with the equipment, and a Partial Mash recipe which is more accessible for extract brewers wanting to incorporate adjuncts correctly.

    5.1. Recipe Formulation (Sample for 5 Gallons / 19 Liters)

    These recipes aim to replicate the key characteristics of a 19th Century Cream Ale. Feel free to adjust batch size using brewing software.

    Target Specifications:

    • Original Gravity (OG): ~1.050
    • Final Gravity (FG): ~1.008 - 1.010
    • Bitterness (IBU): ~20
    • Color (SRM): ~3-4 (Pale Straw to Light Gold)
    • Alcohol by Volume (ABV): ~5.2 - 5.5%

    Yeast Selection (For Both Recipes):

    We recommend SafAle US-05 American Ale Yeast (or Wyeast 1056 / WLP001). We will ferment this at the cool end of its recommended range (60-64°F / 15-17°C) to ensure a clean profile. Prepare a yeast starter or rehydrate dry yeast according to manufacturer instructions.


    Recipe Option 1: All-Grain

    Fermentables:
    • 6.5 lbs (2.95 kg) North American 6-Row Malt (or 2-Row Pale Malt) (72.2%)
    • 2.5 lbs (1.13 kg) Flaked Maize (Corn) (27.8%)
    • Total Grist: 9.0 lbs (4.08 kg)
    Hops:
    • 1 oz (28 g) Cluster Hops (~7% Alpha Acid) – Boil 60 minutes (~20 IBUs)
    Assumptions:
    • ~75% Mash Efficiency
    • Target Mash Thickness: ~1.5 quarts/lb (3 L/kg)
    • Target Pre-Boil Volume: ~6.5 Gallons (24.6 L)
    • Target Post-Boil Volume: ~5.5 Gallons (20.8 L) (into fermenter)

    Recipe Option 2: Partial Mash

    (This method involves mashing the base malt and adjuncts to get their character and fermentability, supplementing with extract to reach the target gravity.)

    Steep/Mash Grains:
    • 2.0 lbs (0.91 kg) North American 6-Row Malt (or 2-Row Pale Malt)
    • 1.5 lbs (0.68 kg) Flaked Maize (Corn)
    Extract:
    • 3.5 lbs (1.59 kg) Pale Liquid Malt Extract (LME) OR ~2.8 lbs (1.27 kg) Pale Dry Malt Extract (DME) – Add during boil
    Hops:
    • 1 oz (28 g) Cluster Hops (~7% Alpha Acid) – Boil 60 minutes (~20 IBUs calculated based on total volume and gravity)
    Assumptions:
    • Steep/Mash grains in ~1.5 – 2 Gallons (5.7 – 7.6 L) water.
    • Total Boil Volume: Aim for ~6.0 – 6.5 Gallons (22.7 – 24.6 L) before boil starts (top up with water after mash if needed).
    • Target Post-Boil Volume: ~5.5 Gallons (20.8 L) (into fermenter)

    5.2. Mashing (All-Grain / Partial Mash)

    This is where we convert the starches in our grains (and adjuncts) into fermentable sugars. Since we’re using flaked maize (corn) in our sample recipes, which is pre-gelatinized, we don’t need a separate complex ‘cereal mash’ step that would be required for something like corn grits. This simplifies brew day significantly while still incorporating those crucial adjuncts.

    For All-Grain Brewers:

    1. Heat Your Strike Water: Heat your brewing water (calculate the volume needed for your desired mash thickness, e.g., 1.5 quarts/lb or 3 L/kg) to a few degrees above your target mash temperature to account for heat loss when mixing with the cooler grains. Brewing software is very helpful for calculating this strike water temperature accurately.
    2. Mash In: Slowly combine your crushed 6-row (or 2-row) malt and flaked maize with the hot strike water in your mash tun, stirring gently but thoroughly to avoid dough balls.
    3. Check Temperature & Adjust: Ensure the mash temperature stabilizes within the target range of 148-152°F (64-67°C). This range promotes good fermentability, leading to a drier finish suitable for the style. If you’re slightly low, you can add a small amount of boiling water carefully; if slightly high, add a small amount of cold water or stir until it drops.
    4. Rest: Hold the mash within this temperature range for 60 minutes. Maintain the temperature as consistently as possible (a well-insulated mash tun helps).
    5. Mash Out (Optional but Recommended): After the 60-minute rest, you can perform a mash-out. Raise the temperature of the mash to 168°F (76°C) and hold for 5-10 minutes. This stops enzymatic activity and makes the sugary wort less viscous and easier to drain (lauter). You can achieve this via direct heat (if your system allows), by adding carefully measured boiling water infusions, or by decoction (though decoction is generally not traditional for this style).

    For Partial Mash Brewers:

    1. Heat Water: Heat approximately 1.5 to 2 gallons (5.7 – 7.6 L) of water in your brew kettle to your calculated strike temperature (aiming for the same mash temp as all-grain: 148-152°F / 64-67°C).
    2. Steep/Mash: Place your crushed 6-row (or 2-row) malt and flaked maize into a large grain bag. Turn off the heat under the kettle. Immerse the grain bag in the hot water. Stir gently to ensure all grains are saturated.
    3. Check Temperature & Maintain: Check the temperature of the water/grain mixture (the “mini-mash”). It should be within the 148-152°F (64-67°C) range. Try to maintain this temperature for 60 minutes. You can do this by wrapping the kettle in blankets or placing it in a warm oven (turned off, just using residual heat). You may need to apply gentle heat for short bursts if the temperature drops too much, but be careful not to scorch the bag or overshoot the temperature.
    4. Remove Grains: After 60 minutes, lift the grain bag out of the kettle, allowing the sweet wort to drain completely. Avoid squeezing the bag excessively, as this can extract tannins. You can rinse the grain bag briefly with a quart or two of hot water (~170°F / 77°C) over the kettle to capture a bit more sugar, but this is optional for partial mash.

    5.3. Lautering & Sparging (All-Grain)

    With the mash complete (and mash-out performed, if you chose that option), it’s time to separate the sugary liquid wort from the spent grains. This two-part process involves first draining the initial wort (lautering) and then rinsing the grains to extract remaining sugars (sparging). The goal is to collect your target pre-boil wort volume (e.g., 6.5 gallons for a 5.5-gallon batch into the fermenter, accounting for boil-off).

    1. Recirculate (Vorlauf): Before fully draining, you need to set the grain bed to act as a natural filter. Slowly draw off about 1-2 quarts of wort from your mash tun valve into a pitcher. You’ll likely see grain particles and husks in this initial runoff. Gently pour this wort back over the top of the grain bed using a spoon or saucer to avoid disturbing it too much. Repeat this process several times (usually 5-15 minutes) until the wort running from the valve is clear and relatively free of grain debris. This recirculation (known as the Vorlauf in German brewing terms) is key to achieving clear wort going into the kettle.
    2. Lauter (First Runnings): Once the wort runs clear, begin slowly draining the wort from the mash tun into your brew kettle. Avoid draining too quickly, which can compact the grain bed and cause a stuck sparge (where liquid flow stops). Maintain a gentle flow. This initial, highly concentrated sugary liquid is called the “first runnings.”
    3. Sparging (Rinsing the Grains): As the level of wort above the grain bed drops, you need to rinse the grains with hot water (sparge water) to extract the remaining sugars. The ideal temperature for sparge water is around 168-170°F (76-77°C) – hot enough to keep sugars flowing but not hot enough to extract tannins. There are different methods for sparging:
      • Fly Sparging (Continuous): This involves continuously adding sparge water to the top of the grain bed at the same rate you are draining wort from the bottom into the kettle. It requires carefully matching inflow and outflow rates and usually employs a sparge arm or similar device to gently distribute the water. This is often considered the most efficient method but requires more attention.
      • Batch Sparging (Simpler): After draining the first runnings completely, close the mash tun valve. Add a calculated volume of hot sparge water (often about half of the remaining volume needed) to the grains, stir gently to mix, let it sit for 10-15 minutes, recirculate (Vorlauf) again briefly, and then drain this batch completely into the kettle. Repeat with a second batch of sparge water if needed to reach your target pre-boil volume. This method is generally easier for homebrewers.
    4. Collect Target Volume: Continue lautering and sparging until you have collected your target pre-boil wort volume in the brew kettle. Keep an eye on the gravity of the runnings towards the end; stop sparging if the gravity drops too low (below ~1.010) or if the wort becomes excessively cloudy or astringent, even if you haven’t quite reached your target volume (it’s better to top up the kettle with a little plain water than extract excessive tannins).

    (Note for Partial Mash Brewers: You essentially completed your lautering/sparging step when you removed and drained the grain bag. You can now proceed directly to preparing for the boil, adding water to your kettle if necessary to reach your target pre-boil volume.)

    5.4. The Boil

    With your full volume of sweet wort collected in the brew kettle, it’s time for one of the most critical and active stages of brew day: the boil. Boiling accomplishes several essential things:

    • Sanitization: Boiling sterilizes the wort, killing off any unwanted microorganisms picked up during mashing and lautering.
    • Hop Isomerization: This is where the magic happens for bitterness. Boiling transforms the alpha acids in your hops into iso-alpha acids, making them soluble in the wort and contributing bitterness to balance the malt sweetness.
    • Volatilization: Unwanted volatile compounds, particularly Dimethyl Sulfide (DMS) which can taste like cooked corn or cabbage, are driven off as steam during a vigorous boil.
    • Concentration & Color Development: Water evaporates during the boil, concentrating the sugars (increasing the gravity) and causing some darkening of the wort through Maillard reactions and caramelization.
    • Protein Coagulation (Hot Break): Boiling helps coagulate proteins and polyphenols, which clump together (visible as the “hot break”) and eventually settle out, contributing to a clearer final beer.

    Let’s Get Boiling:

    1. Apply Heat: Turn up the heat on your burner or element to bring the wort to a rolling boil.
    2. Watch for Boil-Overs! Pay close attention as the wort heats up. Proteins will form foam on the surface (the hot break). This, especially combined with the initial hop addition, can cause a sudden and messy boil-over if you’re not vigilant. Keep a spray bottle with cold water handy to knock down foam, and be ready to reduce the heat temporarily if needed.
    3. Start the Timer & Add Bittering Hops: Once a stable, rolling boil is achieved, start your timer for the full boil duration (typically 60 to 75 minutes as planned in your recipe). Immediately add your measured bittering hop charge (the 1 oz of Cluster hops in our example). This addition maximizes the time the hops spend boiling, extracting the necessary bitterness.
    4. Maintain a Rolling Boil: You want a moderately vigorous, rolling boil throughout the entire duration. It should be energetic enough to drive off volatiles and facilitate hop isomerization, but not so violent that you’re scorching the wort or boiling off way more volume than planned. Adjust your heat source as needed. Don’t cover the pot completely, as this prevents DMS from escaping.
    5. Kettle Finings (Optional Clarity Aid): If using, add kettle finings like Irish moss or Whirlfloc during the last 15 minutes of the boil. Follow the package instructions for the amount. These help proteins clump together more effectively, aiding in clarity later on.
    6. No Late Hops: Remember, for this historical style, we are generally not adding hops late in the boil for flavor or aroma. Stick to the single bittering addition.
    7. End of Boil: When your timer goes off, turn off the heat source. Your wort is now hopped, sanitized, and concentrated.

    5.5. Cooling & Transferring

    Now that the boil is complete, we need to cool the wort down from boiling temperature to our target yeast pitching temperature as rapidly as possible. This is a critical step for several reasons:

    • Halting Hop Isomerization: Cooling quickly stops the hops from continuing to add bitterness beyond what your recipe intended.
    • Reducing DMS Formation: While boiling drives off DMS precursors, some can reform as the wort sits hot. Rapid cooling minimizes this.
    • Creating the Cold Break: Just like the hot break during the boil, rapid chilling causes other proteins and tannins to coagulate and fall out of solution (the “cold break”). This contributes significantly to beer clarity later on.
    • Minimizing Contamination Risk: Wort is most vulnerable to infection by bacteria and wild yeast when it’s warm but below boiling point. Cooling quickly gets it through this danger zone faster.

    Cooling Methods:

    The most effective way to chill wort is using a wort chiller:

    1. Immersion Chiller: This is a common homebrew chiller made of copper or stainless steel tubing. Sanitize it thoroughly (usually by placing it in the boiling wort for the last 10-15 minutes of the boil). After the boil, connect cold water to the chiller’s inlet and run it through the coils immersed in the hot wort. Gently stirring the wort around the chiller (with a sanitized spoon) significantly speeds up cooling. Monitor the wort temperature with a sanitized thermometer.
    2. Counterflow or Plate Chiller: These more advanced chillers work by running hot wort and cold water in opposite directions through separate channels within the chiller. They are very efficient but require careful cleaning and sanitation. Wort is typically pumped or drained by gravity through the chiller directly into the sanitized fermenter.

    Ice Bath (Less Efficient): For smaller batches or if you don’t have a chiller, you can place the covered brew kettle into an ice bath in a sink or large tub. Surround the kettle with ice and cold water. Stir the wort carefully with a sanitized spoon to promote faster cooling. This method takes much longer and increases the risk of contamination if the lid isn’t secure.

    Target Temperature:

    We need to cool the wort down to our target yeast pitching temperature, which we decided earlier for our clean ale fermentation: around 60-64°F (15-17°C). Don’t pitch the yeast if the wort is significantly warmer than this, as it can stress the yeast and lead to off-flavors.

    Transferring to the Fermenter:

    1. Sanitize Everything: Ensure your fermenter, lid/airlock, siphon or transfer tubing, and thermometer are meticulously sanitized before the cooled wort touches them.
    2. Whirlpool (Optional): After cooling (or sometimes right at the end of the boil before cooling starts), you can vigorously stir the wort in the kettle in one direction for a minute or two to create a whirlpool. Let it settle for 10-15 minutes. This helps consolidate the hop debris and cold break material (trub) into a cone at the center bottom of the kettle, allowing you to transfer clearer wort.
    3. Transfer Carefully: Using a sanitized auto-siphon or by opening the kettle valve, gently transfer the cooled wort into your sanitized fermenter. Try to leave as much of the trub (the sludgy layer of hop debris and break material) behind in the kettle as possible. A little trub carryover is fine, but excessive amounts aren’t ideal.

    Aerate the Wort:

    • Why? Unlike almost every other stage of brewing where oxygen is the enemy, your yeast needs oxygen right at the beginning to reproduce and build healthy cell walls for a strong fermentation.
    • How? Once the wort is safely in the fermenter and at pitching temperature, you need to introduce oxygen. You can do this by:
      • Sealing the fermenter and shaking it vigorously for several minutes.
      • Splashing the wort significantly as it transfers into the fermenter (e.g., letting it fall from the end of the siphon tube).
      • Using a sanitized aeration stone connected to an aquarium pump with an inline filter, or ideally, pure oxygen from a tank for 1-2 minutes.
    • Important: Only aerate before pitching the yeast. Introducing oxygen after fermentation has started will lead to stale, oxidized flavors.

    5.6. Fermentation (Critical Stage)

    You’ve successfully created the perfect sugary wort; now it’s time to hand things over to the yeast. Proper fermentation is arguably the most critical factor in achieving the clean, crisp character essential to a historical Cream Ale. Mistakes here, especially regarding temperature, can easily introduce unwanted fruity esters or harsh fusel alcohols that would be out of style.

    1. Pitch the Yeast:
      • Check Wort Temperature: Double-check that your aerated wort is firmly within the target pitching temperature range (60-64°F / 15-17°C). Pitching yeast into wort that’s too warm can shock them, leading to stressed fermentation and off-flavors.
      • Prepare Your Yeast: If using dry yeast (like SafAle US-05), ensure it has been properly rehydrated according to the manufacturer’s instructions. If using liquid yeast (like Wyeast 1056 or WLP001), ensure your starter (if made) is ready, or that the pouch/vial is at room temperature.
      • Pitch: Gently pour or swirl your prepared yeast into the aerated wort.
    2. Seal and Airlock:
      • Securely place the sanitized lid on your fermenter.
      • Fill your sanitized airlock with sanitizer solution or a neutral spirit (like vodka) up to the indicated line and insert it into the fermenter lid’s grommet. This allows CO2 produced during fermentation to escape while preventing oxygen and contaminants from entering.
    3. Fermentation Temperature Control (The Key to Cleanliness):
      • Target Range: Place your fermenter in an environment where you can maintain a consistent temperature between 60-64°F (15-17°C). This is the cool end of the recommended range for US-05/1056/WLP001 and is crucial for suppressing ester production. Avoid temperature fluctuations.
      • Methods:
        • Fermentation Chamber: A dedicated fridge or freezer with an external temperature controller is the most reliable method.
        • Swamp Cooler: Placing the fermenter in a tub of water and covering it with a wet t-shirt or towel can help regulate temperature through evaporative cooling, especially in slightly warmer ambient conditions. Using frozen water bottles in the bath can help lower the temperature further.
        • Cool Basement: A naturally cool basement might maintain the right temperature range, but monitor it closely with a thermometer attached to the side of the fermenter (ideally insulated under a piece of foam) to measure the actual liquid temperature, not just the air temp.
      • Why it Matters: Fermenting even a few degrees warmer (e.g., above 68°F / 20°C) with these yeast strains can start producing noticeable fruity esters (like pear, apple, or banana) which are undesirable in this crisp, clean style.
    4. Monitor Activity:
      • Within 12-48 hours, you should see signs of fermentation: bubbling through the airlock and potentially a krausen (a foamy head) forming on top of the beer.
      • The most active phase usually lasts 3-7 days. Don’t rely solely on airlock activity to judge completion – it can slow down or stop even if fermentation isn’t quite finished.
    5. Duration & Gravity Check:
      • Primary fermentation will typically take 1 to 2 weeks at these cooler temperatures.
      • The only reliable way to know if fermentation is complete is by taking gravity readings with a sanitized hydrometer or refractometer (remembering to correct refractometer readings for alcohol).
      • Once bubbling slows significantly (e.g., after 7-10 days), take a gravity reading. Wait another 2-3 days and take another reading. If the gravity reading is stable (unchanged) over those 2-3 days and is within the expected final gravity range (FG: ~1.008 - 1.010), fermentation is complete. Do not rush this step!

    5.7. Conditioning / Lagering (Optional but Recommended)

    While primary fermentation has converted the sugars to alcohol, the beer can still benefit significantly from a period of cold conditioning, often referred to as “lagering” even when done with an ale yeast fermented cool. Remember, the historical goal was to create an ale that closely resembled a lager in clarity and crispness. Cold conditioning is a key technique to help achieve this.

    Why Cold Condition?

    • Enhanced Clarity: Chilling the beer encourages yeast, proteins, and polyphenols that cause haze to clump together and slowly settle out, resulting in a brilliantly clear final product.
    • Smoother Flavor Profile: Cold conditioning can help mellow any slight harshness and round out the flavors, leading to a smoother, more refined beer.
    • Crisper Finish: By dropping out suspended particles and allowing flavors to meld, cold conditioning contributes to that desired crisp, clean finish.
    • Historical Approximation: While techniques varied, it’s likely that brewers aiming to compete with lagers employed some form of cold storage or aging to improve their Cream Ale’s lager-like qualities.

    The Process:

    1. Ensure Primary Fermentation is Complete: Do not start chilling until you have confirmed with stable gravity readings that primary fermentation is absolutely finished. Chilling too early can cause the yeast to go dormant prematurely, leaving unfermented sugars.
    2. Racking to Secondary (Optional): Traditionally, lagering often involves racking (transferring) the beer off the primary yeast cake into a clean, sanitized secondary vessel (like another carboy) before chilling.
      • Pros: Gets the beer off the bulk of the dead yeast and trub, potentially leading to slightly better clarity and avoiding off-flavors from yeast autolysis (though autolysis is less of a risk with modern yeast and shorter conditioning times).
      • Cons: Every transfer introduces a small risk of oxidation and contamination.
      • Recommendation for this Style: For a 2-4 week cold conditioning period, racking to secondary is likely not necessary and you can probably achieve excellent results by simply chilling in the primary fermenter. This minimizes oxidation risk. If you plan a very long conditioning phase (months), then racking might be considered.
    3. Gradual Cooling (Ideal but Not Essential): Ideally, you would gradually lower the temperature over a few days to avoid shocking the remaining yeast, but for homebrew purposes, carefully transferring the fermenter to your cold conditioning environment usually works fine.
    4. Target Temperature: Aim for a temperature as close to freezing as possible without actually freezing the beer. A range of 32-40°F (0-4°C) is ideal. A dedicated lagering fridge or keezer is perfect for this.
    5. Duration: Allow the beer to condition at this cold temperature for at least 2 weeks, and preferably 3-4 weeks. Longer periods (up to 6-8 weeks) can yield further improvements in clarity and smoothness, but 3-4 weeks often strikes a good balance.
    6. Keep it Sealed: Ensure the fermenter remains sealed under an airlock during cold conditioning. Some minor CO2 release might occur initially as the liquid cools and gas solubility increases, or if any trace fermentation finishes up.

    By patiently giving your Cream Ale this cold rest, you’ll be taking a significant step towards replicating the bright appearance and crisp character that 19th-century brewers strived for.

    Section 6: Packaging Your Historical Brew

    After weeks of careful brewing, fermentation, and perhaps cold conditioning, your 19th Century Cream Ale is finally ready for its last step before pouring: packaging and carbonation. Whether you prefer bottles or kegs, the goal is to achieve a level of carbonation that complements the beer’s light body and enhances its crisp, refreshing finish.

    Sanitation is Paramount: As always, ensure absolutely everything that touches your finished beer post-fermentation is meticulously cleaned and sanitized – bottles, caps, bottling bucket, siphon, tubing, kegs, connectors, etc. This is your last chance to prevent infection that could spoil your hard work.

    Option 1: Bottling

    Bottling relies on adding a small, precise amount of priming sugar just before packaging. The remaining yeast in the beer will consume this sugar inside the sealed bottle, naturally creating CO2 and carbonating the beer.

    1. Calculate Priming Sugar: Cream Ale benefits from a moderate to high level of carbonation to accentuate its crispness. Aim for 2.5 to 3.0 volumes of CO2. Use an online priming sugar calculator – you’ll need to input your beer volume, the highest temperature the beer reached after active fermentation ceased (this helps estimate residual CO2), and your target CO2 volume. Corn sugar (dextrose) is a common and neutral choice.
    2. Prepare Sugar Solution: Dissolve the calculated amount of priming sugar in a small amount of boiled water (1-2 cups). Let this solution cool slightly.
    3. Transfer to Bottling Bucket: Gently siphon the beer from your fermenter into a sanitized bottling bucket, leaving behind the yeast sediment. Avoid splashing to minimize oxygen exposure.
    4. Add Sugar Solution: Gently pour the cooled priming sugar solution into the bottling bucket as the beer transfers, allowing the gentle swirling motion of the transferring beer to mix it evenly. Avoid vigorous stirring, which introduces oxygen.
    5. Fill Bottles: Attach sanitized tubing to the bottling bucket spigot and connect a sanitized bottle filler. Fill each sanitized bottle, leaving about an inch of headspace at the top.
    6. Cap Bottles: Place sanitized caps on each bottle and crimp them securely with a bottle capper.
    7. Bottle Condition: Store the capped bottles in a dark place at room temperature (around 68-72°F / 20-22°C) for 2 to 3 weeks. This allows the yeast time to consume the priming sugar and carbonate the beer.
    8. Chill Before Serving: Once carbonated, chill the bottles thoroughly before opening and enjoying.

    Option 2: Kegging

    Kegging offers more control over carbonation and is generally faster.

    1. Transfer to Keg: Gently siphon the finished beer from your fermenter into a sanitized keg, again leaving yeast sediment behind. Aim for a closed transfer if possible (using CO2 pressure to push the beer) to absolutely minimize oxygen exposure, which is crucial for the longevity and flavor stability of a pale, light beer like Cream Ale.
    2. Seal Keg & Purge Headspace: Seal the sanitized keg lid. Connect your CO2 gas line and briefly inject CO2 into the keg (e.g., at 10-15 PSI) several times, pulling the pressure relief valve each time to purge any oxygen from the headspace above the beer.
    3. Force Carbonate: Chill the keg down to your serving temperature (typically 38-45°F / 3-7°C). Carbonate using one of these methods:
      • Set-and-Forget: Look up a carbonation chart (using your beer temperature and target CO2 volume of 2.5-3.0 vols) to find the correct CO2 pressure setting. Set your regulator to that pressure, connect the gas line to the keg’s “gas in” post, and leave it for 1-2 weeks. The CO2 will slowly dissolve into the beer.
      • Crank and Shake (Faster): Set the regulator to a higher pressure (e.g., 30 PSI), connect the gas, and gently rock or shake the keg for several minutes to speed up CO2 absorption. Turn the pressure down, let it sit, test carbonation, and repeat carefully until desired level is reached. This method is faster but risks over-carbonation if not done carefully.
    4. Serve: Once carbonated, adjust the pressure to your serving pressure (usually lower, around 8-12 PSI) and enjoy your draft historical Cream Ale!

    Whichever method you choose, proper carbonation is key to lifting the delicate flavors and delivering that satisfyingly crisp finish that defines this classic American style.

    Section 7: Troubleshooting & Tips for Peak Authenticity

    Even with careful planning, brewing sometimes presents challenges. Here are some common issues you might encounter when brewing a 19th Century Cream Ale and tips to nail that authentic character:

    Common Troubleshooting:

    • Issue: Corn Flavor Too Strong or “Vegetal”

      Cause: Often related to DMS (Dimethyl Sulfide), which can present as cooked corn or cabbage. Can be exacerbated by a weak boil, slow cooling, or certain grain/malt issues. Sometimes, the specific corn adjunct used can contribute a flavor some find too assertive.

      Solution: Ensure a vigorous, rolling boil for at least 60 minutes (preferably 75) without the lid fully on. Cool the wort as rapidly as possible post-boil. Ensure good grain quality. If consistently finding the corn flavor too strong despite good process, consider slightly reducing the percentage of flaked maize next time, or trying flaked rice as an alternative adjunct.

    • Issue: Beer Isn’t Clearing / Hazy Finish

      Cause: Insufficient protein coagulation (hot or cold break), yeast remaining in suspension, or starch haze from adjuncts if mashing wasn’t complete.

      Solution: Use kettle finings (Irish moss/Whirlfloc) during the boil. Ensure rapid chilling post-boil to maximize cold break. Allow adequate conditioning time, especially cold conditioning (lagering), which is highly effective. Choose a yeast strain known for good flocculation (settling out), though many clean ale strains are moderate flocculators. If using partial mash, ensure you held the mash temperature correctly.

    • Issue: Fruity or Estery Flavors (Apple, Pear, Banana, etc.)

      Cause: Almost always due to fermentation temperatures being too high for the chosen yeast strain, stressing the yeast. Underpitching yeast can also contribute.

      Solution: Strict fermentation temperature control is non-negotiable! Keep the fermenting beer within that cooler range (60-64°F / 15-17°C for US-05/1056/WLP001). Ensure you are pitching an adequate amount of healthy yeast (use a pitching rate calculator and make a starter for liquid yeast if needed).

    • Issue: Beer Tastes Thin or Watery

      Cause: Mashed too low (promoting excessive fermentability), fermentation finished at a very low FG, or recipe formulation lacked sufficient body.

      Solution: Aim for the slightly higher end of the recommended mash temperature range (e.g., 150-152°F / 66-67°C) to leave slightly more unfermentable sugars. Double-check OG/FG calculations. Ensure FG didn’t drop significantly lower than expected. While historically light-bodied, ensure your malt/adjunct bill provides enough substance. (Avoid going below 15% adjuncts unless specifically desired).

    • Issue: Astringency (Dry, Puckering Sensation)

      Cause: Often from extracting tannins from grain husks due to sparging with water that’s too hot (above 170°F / 77°C), over-sparging (rinsing too much, collecting wort below 1.010 gravity), or squeezing grain bags excessively in partial mash.

      Solution: Carefully monitor sparge water temperature. Stop collecting runnings if the gravity drops too low. Handle grains gently during and after mashing/sparging.

    Tips for Enhancing Authenticity:

    • Source 6-Row Malt: If you can find it, using North American 6-row malt adds a subtle grainy complexity true to the era.
    • Embrace Cluster Hops: Resist the urge to substitute with modern, trendy hops. Stick with Cluster (or similar period-appropriate hops) used primarily for bittering.
    • Don’t Skip the Adjuncts: Corn or rice are integral to the historical style’s character and light body. Don’t try to make an all-malt version and call it a historical Cream Ale.
    • Master Fermentation Temp: We can’t stress this enough – a clean fermentation achieved through cool temperatures is paramount.
    • Cold Condition (Lager): Even if using ale yeast, give your beer 3-4 weeks of cold conditioning near freezing. It makes a significant difference in clarity and crispness, mimicking the lager qualities they were chasing.
    • Appreciate the Subtlety: This isn’t a hop bomb or a complex malt showcase. Appreciate it for what it is: a clean, crisp, refreshing, and historically significant American beer style.

    Section 8: Conclusion: Tasting the Past

    Congratulations! You’ve journeyed back to the 19th century and successfully brewed a style born from American ingenuity and competition. By carefully selecting historical ingredients like 6-row malt and corn adjuncts, using period-appropriate hops like Cluster for subtle bitterness, and meticulously controlling fermentation for a clean, lager-like profile, you’ve recreated much more than just a beer – you’ve brewed a piece of American history.

    This 19th Century American Cream Ale stands as a testament to the brewers who adapted and innovated in the face of the overwhelming popularity of lagers. It’s a style defined by its crisp finish, pale golden clarity, and refreshing drinkability – qualities achieved through clever use of adjuncts and techniques aimed at mimicking its lager rivals, all while being fermented as an ale.

    We hope this guide has provided you with the knowledge and confidence to tackle this rewarding brew. Whether you’re enjoying it on a warm afternoon or sharing it with friends curious about brewing history, take a moment to appreciate the subtle flavors and the story behind this often-overlooked classic. It’s a refreshing reminder that the pursuit of light, crisp beer has deep roots in the American brewing tradition.

    So chill down those bottles or pour a pint from the keg, raise a glass to the brewers of the past, and enjoy the authentic taste of 19th Century American Cream Ale!

    We’d love to hear how your brew day went! Did you try the recipe? Encounter any interesting challenges or successes? Share your experiences, questions, or tasting notes in the comments below!

  • Crisp, Clean, and Crowned: How Craft Beer Awards Are Fueling the Lager Comeback


    The Lager Revolution: Why Crisp Beers Are Dominating Craft Awards


    The Lager Revolution: Why Crisp Beers Are Dominating Craft Awards

    (Disclosure: This post may contain links to affiliate products or reviews. If you make a purchase through these links, Foamy Horizons may earn a commission at no extra cost to you.)

    In a craft beer world seemingly saturated with milkshake IPAs and triple dry-hopped hazies, something quietly significant is happening: lagers are back—and they’re winning big. While bold flavors once screamed loudest, the spotlight is increasingly turning towards technical perfection, precise fermentation, and the subtle elegance of well-crafted lagers.

    Award stages from the World Beer Cup in the US to the Brewers Guild Awards in New Zealand are celebrating golden pilsners, crisp Helles, and malt-forward bocks. It’s clear: in the demanding arena of international competition, lager is no longer just refreshing, it’s revered.

    Craft Beer Awards: The Proving Ground for Precision

    Competitions are where breweries earn their stripes, and the standards are higher than ever.

    🏆 The World Beer Cup: The Global Gold Standard

    Often called “the Olympics of Beer,” the World Beer Cup (WBC) is arguably the most prestigious brewing competition globally. In 2024, a staggering 10,500+ beers from 57 countries were submitted. Here, beers aren’t just compared to each other; they’re judged against stringent style guidelines demanding near-perfection. It’s on this stage that beers like Wild Ride Brewing’s Cole’s Light Lager and pFriem’s German-style Pilsner recently struck gold – proving that clean, crisp lagers can compete and win at the absolute highest level.

    Gear Spotlight for Lager Precision: Achieving the clean fermentation essential for award-winning lagers often requires meticulous temperature control and minimizing oxygen exposure. Investing in quality fermentation gear, like a well-designed conical fermenter (read our thoughts on options like Spike Brewing’s here), provides greater control over these critical factors.

    🌍 Meininger’s International Craft Beer Award: German Precision Rules

    This European competition utilizes a detailed 100-point evaluation scale and spider-web flavor diagrams, dissecting each beer’s attributes individually. This analytical approach naturally favors lagers, rewarding clarity, balance, subtle malt and hop nuances, and flawless execution.

    🇳🇿 Brewers Guild of New Zealand Awards: Lager Shines Down Under

    Even in regions known for hop-forward styles, lagers are making waves. In 2024, wins for beers like Parrotdog’s Sundog Pilsner and Sprig + Fern’s G.O.A.T Doppelbock highlighted a lager renaissance in the Southern Hemisphere, proving these styles aren’t just niche players but award-worthy contenders.

    The Judge’s Palate: Why Clean Beers Get Their Due

    Lagers are notoriously unforgiving. There are no massive hop additions or adjunct flavors to hide behind. Any flaw – a hint of diacetyl (butterscotch), DMS (cooked corn), acetaldehyde (green apple), or incomplete fermentation – stands out glaringly to a trained judge. This technical challenge is precisely why rigorous judging platforms are perfect for showcasing lager excellence.

    Blind tasting panels, formal sensory training (like BJCP), and adherence to style guidelines ensure that subtle balance, drinkability, and technical perfection are rewarded – all hallmarks of a great lager.

    The Ripple Effect: What Winning Means for Breweries

    Medals translate to credibility and sales. For smaller breweries focusing on traditional styles, an award can provide crucial market visibility and validation. For established breweries like Samuel Adams, winning awards for their lagers reinforces the quality of their core lineup. In a crowded market, a gold medal for a lager signals true brewing mastery.

    Why Lagers, Why Now? The Converging Trends

    Several factors are contributing to the lager resurgence:

    • Palate Shift: After years of intense flavors, many consumers (and brewers!) are seeking clean, crisp, highly drinkable beers without overwhelming bitterness or sweetness.
    • “Better-for-You” Perception: While not always the case, many classic lager styles naturally have lower ABVs and calorie counts compared to heavier ales, aligning with health-conscious trends.
    • The Brewer’s Challenge: In a mature craft market, successfully brewing a flawless lager is seen as a benchmark of technical skill and brewing prowess. It separates the contenders from the pretenders.

    Even experimental breweries known for pushing boundaries, like New Zealand’s Garage Project, are increasingly embracing well-executed classic lager styles alongside their innovative creations.

    Quick Reference: Lager Styles Taking Center Stage

    Keep an eye out for these award-winning styles:

    Style Profile Why It’s Trending
    Pilsner (German/Czech/Italian) Crisp, dry, noticeable hop bitterness/aroma The classic refreshing lager; nuances appreciated
    Helles Soft malt sweetness, subdued hops, clean Ultimate sessionability, subtle complexity
    Vienna Lager Amber, toasty malt, balanced bitterness Approachable malt character without being heavy
    Doppelbock Rich, malty, strong (but smooth), dark fruit notes Showcases malt complexity; impresses judges
    India Pale Lager (IPL) IPA hop levels, clean lager fermentation profile Bridge between hop lovers and lager crispness
    Dark Lagers (Schwarzbier/Dunkel) Roasty yet smooth, light body, clean finish Flavorful alternative to stout/porter; surprisingly drinkable

    Homebrewer’s Notes: Tips for Brewing Award-Worthy Lagers

    Inspired to brew your own clean machine? Focus on these fundamentals:

    • Temperature Control is Paramount: Lagers require cool fermentation (often 48-55°F / 9-13°C) and extended cold conditioning (lagering) near freezing. This isn’t optional for quality results.
    • Patience is a Virtue: Don’t rush fermentation or lagering. Proper cold conditioning (often 4–8 weeks) smooths flavors and improves clarity.
    • Quality Ingredients, Simple Recipe: Use high-quality Pilsner or Vienna malt as your base. Keep recipes focused – let the malt, clean yeast character, and subtle hops (if any) shine.
    • Pitch Plenty of Healthy Yeast: Lager fermentations require significantly larger yeast pitches than ales due to colder temperatures. Make a large starter or pitch multiple packs.
    • Water Chemistry Matters: Soft water is often preferred, especially for Pilsners. Research target water profiles for your chosen style.

    🔧 Essential Budget Gear for Temp Control: If a dedicated fermentation chamber isn’t feasible yet, an external temperature controller like the Inkbird ITC-308 (see how it works here) paired with a fridge or freezer is a cost-effective way to gain crucial control over fermentation temperatures.

    Common Lager Brewing Mistakes to Avoid

    • ❌ Underpitching yeast (leads to stressed yeast, off-flavors).
    • ❌ Fermenting too warm (results in excessive esters, defeating the ‘clean’ profile).
    • ❌ Rushing fermentation or skipping the cold lagering phase (results in harsh flavors, poor clarity).
    • ❌ Overcomplicating the recipe (too many specialty malts or hop additions obscure the lager character).
    • ❌ Ignoring water chemistry (can impact mash efficiency and final flavor).

    Conclusion: The Elegant Return of Restraint

    The craft beer landscape is evolving. As brewers refine their techniques and drinkers seek balance, the elegant simplicity and technical challenge of lagers are being rightfully celebrated. These aren’t just “lawnmower beers” anymore; they are sophisticated, diverse, and demanding styles that represent the pinnacle of brewing control.

    With crisp, clean lagers consistently collecting gold medals worldwide, we’re witnessing a refreshing shift – a **new kind of craft revolution** fueled by clarity, precision, and the pursuit of perfection.


    Let’s Keep the Lager Love Flowing 🍻

    What are your thoughts on the lager comeback? Are you brewing lagers at home, or have you tried an award-winner recently that blew you away?

    Share your favorite lager styles and brewing experiences in the Foamy Horizons Brewing Community!

    And don’t forget to subscribe to our newsletter for more brewing insights, gear reviews, and the latest craft beer trends delivered to your inbox.

    👉 Join the Foamy Horizons Newsletter & Community


  • Amber Ale

    ABV: 5.0% | IBU: 25 | Style: Amber Ale 🍺

    Introduction

    Amber ales provide a delightful balance of malt sweetness and hop bitterness, creating a versatile beer enjoyed by novices and connoisseurs alike. This guide will lead you through brewing Easy Amber Ale at home, enriched with insights into its history and practical tips to achieve perfection every time. Whether you’re a seasoned brewer or just getting started, this comprehensive resource will enhance your brewing skills.

    A Brief History of Amber Ale

    Amber Ale originated in Europe, evolving notably in the American craft beer revolution of the 1980s. Brewers infused the traditional style with vibrant American hops, resulting in the flavorful, balanced brew known today. This evolution was characterized by the use of locally sourced ingredients, new brewing techniques, and a pioneering spirit that defined the American beer renaissance.

    The Science Behind Brewing Amber Ale

    The key to Amber Ale lies in its malt composition—usually amber or crystal malts—imparting caramel notes and a rich amber color. Balanced by moderate hop bitterness, it achieves a harmonious flavor profile. Controlling the mash temperature is crucial as it determines the fermentability of sugars, directly impacting the beer’s body and sweetness.

    Step-by-Step Brewing Guide

    1. Steep 8 oz Crystal 60L malt in 3 gallons water at 155°F (68°C) for 30 minutes.
    2. Add 6 lbs Amber DME, bring to a boil, and add 1 oz Willamette hops.
    3. Boil for 50 minutes, then add 1 oz Cascade hops during the final 10 minutes.
    4. Rapidly cool wort to 70°F (21°C), transfer to fermenter, and top up to 5 gallons.
    5. Pitch yeast and ferment at 65-70°F (18-21°C) for two weeks.
    6. Bottle beer with priming sugar, and condition bottles for 1-2 weeks.

    Equipment Recommendations

    Advanced Brewing Techniques

    Experienced brewers might experiment with:

    • All-Grain Brewing: Enhances flavor complexity and control by allowing precise adjustments to grain bills.
    • Water Chemistry Adjustments: Balancing sulfate and chloride levels enhances malt sweetness and hop bitterness.
    • Dry Hopping: Boost aroma by adding hops post-fermentation, enhancing complexity and freshness without additional bitterness.

    Common Brewing Mistakes and Solutions

    • Cloudy Beer: Chill wort rapidly and consider using clarifying agents like Irish moss.
    • Off-Flavors: Ensure strict sanitation practices and consistent fermentation temperatures to avoid infections or unwanted flavors.
    • Under-carbonation: Verify priming sugar measurements and thoroughly mix during bottling.

    Variations on the Recipe

    Try these exciting variations:

    • Toasted Amber: Add toasted malt for deeper nutty notes.
    • Citrus Twist: Incorporate orange peel or additional citrus hops like Amarillo.
    • Spiced Amber: Introduce spices such as cinnamon or nutmeg for a seasonal twist.

    Food Pairing Suggestions

    Amber Ale pairs wonderfully with grilled meats, BBQ ribs, burgers, aged cheddar cheese, and hearty stews, complementing the beer’s rich malt character and balanced bitterness.

    Tasting Notes and Sensory Analysis

    Expect a clear amber appearance with aromas of caramel, biscuit, and subtle fruitiness. Taste reveals malt sweetness balanced by gentle hop bitterness, with a smooth finish and medium-bodied mouthfeel.

    Frequently Asked Questions (FAQs)

    • How long does amber ale take to ferment? Approximately two weeks, followed by bottle conditioning.
    • What’s the best serving temperature? Serve between 45-55°F (7-13°C) for optimal flavor.
    • Can I substitute crystal malt? Yes, lighter or darker crystal malts will slightly alter color and sweetness.
  • Cinnamon Roll Ale

    Cinnamon Roll Ale

    Introduction: A Flavorful Start

    Homebrewing is an engaging and rewarding hobby that allows enthusiasts to create unique beverages tailored to personal tastes. Among the myriad varieties to explore in homebrewing, Cinnamon Roll Ale stands out for its delightful fusion of a classic amber ale with the comforting flavors reminiscent of freshly baked cinnamon rolls. This distinctive recipe combines traditional brewing techniques with a sprinkle of creativity, delivering a beer that is both aromatic and flavorful.

    The appeal of Cinnamon Roll Ale lies in its harmonious blend of malt sweetness, subtle spice, and a hint of warmth, making it an ideal choice for both novice brewers and seasoned hop enthusiasts. As you embark on the journey to craft your very own Cinnamon Roll Ale, you will find the process as satisfying as the final product. Each sip invokes a sense of nostalgia, transporting drinkers to cozy afternoons spent enjoying homemade pastries. The interplay between the caramel malt base and cinnamon makes this amber ale not only enjoyable but also memorable.

    For those eager to dive into the world of homebrewing, finding the right equipment and ingredients is crucial. We recommend exploring high-quality brewing kits designed for all skill levels, which can simplify the brewing process and ensure consistent results. Quality brewing supplies not only enhance your Cinnamon Roll Ale experience but also streamline your brewing journey. So, gather the necessary ingredients, embrace your creativity, and prepare to indulge in the extraordinary flavors of this one-of-a-kind amber ale. Your adventure into the art of brewing begins here.

    Ingredients and Recipe Overview

    Brewing your own Cinnamon Roll Ale requires careful selection of base ingredients and precise measurements to achieve the desired flavor profile. This unique amber ale is crafted to deliver a complex blend of spice and sweetness reminiscent of a fresh cinnamon roll. Below is a comprehensive list of the essential ingredients along with their corresponding measurements.

    For the grain bill, start with 9 pounds of pale malt, which serves as the backbone of your amber ale, providing the necessary sugars for fermentation. In addition, include 1 pound of Munich malt to contribute malt sweetness and a rich body. To enhance the ale’s color and add a caramel-like sweetness, incorporate 0.5 pounds of crystal malt (40L) and 0.25 pounds of crystal malt (10L). For a hint of bread-like flavor, 0.5 pounds of biscuit malt can be added as well.

    The hops are crucial to balance the ale’s sweetness. Use 1 ounce of Magnum hops for bittering, added at the beginning of the boil, followed by 0.5 ounces of Saaz hops for a gentle aroma to be added during the final five minutes of the boil. This blend will provide an IBU (International Bitterness Units) of approximately 30, resulting in a pleasant, subtle bitterness.

    When it comes to spices, the hallmark of this brew, utilize 2 tablespoons of cinnamon and 1 tablespoon of vanilla extract to enhance the flavor complexity. These ingredients should be added during the last few minutes of the boil to preserve their aromatic qualities. The yeast selection is also crucial; a clean fermenting American ale yeast like Safale US-05 is recommended to maintain balance without overshadowing the flavor additions.

    Once fermentation has completed, expect an average ABV (Alcohol by Volume) of around 5.5%, making this amber ale both enjoyable and sessionable. By gathering these ingredients, you set the stage for crafting a delightful Cinnamon Roll Ale that is sure to be a hit among beer enthusiasts.

    Essential Equipment for Brewing Cinnamon Roll Ale

    Brewing your own cinnamon roll ale requires specific equipment to ensure a successful and enjoyable brewing experience. Below is a list of essential items needed for this unique amber ale recipe, along with descriptions and links to assist you in sourcing each piece of equipment.

    Brew Kettle: A large brew kettle is essential for boiling your ingredients and achieving the necessary temperature. A 5-gallon (19 liters) stainless steel brew kettle is recommended, as it provides sufficient space for the wort. Consider this Northern Brewer Brew Kettle for high-quality performance.

    Fermenter: After boiling, the wort must be cooled and transferred to a fermenter, where yeast will be added. A glass carboy or a food-grade plastic fermenter with an airlock works best. You can find a widely recommended Fast Ferment Conical Fermenter here that meets safety standards.

    Sanitizer: Cleanliness is crucial in brewing, and effective sanitization can make the difference between a brew success and failure. A no-rinse sanitizer, such as Star San, is a popular choice among homebrewers. Look for it here.

    Thermometer: To monitor temperatures accurately throughout the brewing process, a reliable thermometer is necessary. Digital thermometers are often preferred for their accuracy. Consider adding this Inkbird Digital Thermometer to your toolkit.

    Hydrometer: To measure the specific gravity of your wort and finished beer, a hydrometer is indispensable. It helps in determining the alcohol content of your brew. You can find a good hydrometer here.

    Step-by-Step Brewing Guide

    With the necessary equipment on hand, follow this brewing guide to create your cinnamon roll ale. Begin by heating a portion of water in your brew kettle to about 160°F (71°C). Once heated, add malt extract, stirring to dissolve completely. Bring the mixture to a boil and add hops as per your chosen amber ale recipe. After boiling for approximately 60 minutes, turn off the heat and cool the wort using a wort chiller or an ice bath.

    After the wort has cooled to about 70°F (21°C), transfer it to the fermenter, topping off with water to reach the desired five-gallon mark. Pitch your yeast into the wort and seal the fermenter with an airlock. Store the fermenter in a cool, dark place for fermentation to occur over the next one to two weeks.

    Once fermentation is complete, it is time to bottle your cinnamon roll ale. Sanitize your bottles and caps, then use a bottling wand to fill each bottle, leaving about an inch of headspace. Cap the bottles and allow them to carbonate at room temperature for another two weeks. Your unique cinnamon roll ale will be ready to taste and enjoy!

    Expert Tips and Additional Resources

    For those embarking on the journey to brew your own cinnamon roll ale, several tips from experienced brewers can greatly enhance the quality of your finished product. One crucial factor is maintaining optimal fermentation temperature. Fermentation typically occurs best between 65°F to 75°F (18°C to 24°C). Consistently monitoring and controlling the fermentation environment can lead to a cleaner taste and minimize the likelihood of off-flavors. Consider employing a dedicated fermentation chamber or using temperature control methods to stabilize the climate for your yeast.

    Another important consideration is the balance of spices in your ale. While cinnamon is the star ingredient, it is essential to think about how it interacts with others, such as nutmeg or vanilla. Start modestly with your spice additions, and conduct taste tests throughout the brewing process. This will enable you to adjust quantities based on your palate, ensuring a personalized and sophisticated flavor profile. For best results, allow the beer to condition and mature for several weeks post-brewing, as this time can significantly enhance the integration of flavors.

    For beginners, investing in a comprehensive brewing kit that includes all necessary equipment and ingredients is advisable. Consider options such as the Northern Brewer Home Brewing Kit or the MoreBeer Homebrew Starter Kit, which provide a user-friendly experience. Additionally, online platforms like Udemy Brewing Courses and Skillshare Brewing Classes offer specialized courses to help elevate your brewing skills.

    As you build your knowledge and hone your skills, don’t hesitate to explore this delightful brewing adventure. By integrating these expert tips and leveraging available resources, you will be well on your way to crafting a cinnamon roll ale that impresses friends and family alike. Begin your brewing journey today, and savor the rewarding experience of creating your signature ale.

  • S’mores Stout

    S’mores Stout

    The Allure of Campfire Stout

    Imagine the warmth of a crackling campfire, the glow casting shadows on the surrounding trees as night falls. The aroma of burnt wood mingles with the sweet scent of roasting marshmallows and the crumbly texture of graham crackers, creating an idyllic scene of camaraderie and comfort. This is the enchanting essence of Campfire Stout, a brew that aims to encapsulate that cozy feeling in every sip. This unique stout is not just a beverage; it is an experience, inviting you to indulge in its rich, smoky, and chocolatey flavors that evoke fond memories of nights spent outdoors.

    At its core, Campfire Stout boasts a complex flavor profile that balances rich malts with subtle hints of smoke, imparting a depth that is both intriguing and satisfying. The chocolate notes are reminiscent of decadent desserts, beckoning with each sip. As you savor this stout, you will taste the familiar sweetness of gooey marshmallows, a nostalgic nod to childhood camping trips. The graham cracker component adds a delightful crunchiness, further enhancing the overall experience. Together, these flavors create a harmonious blend that transports drinkers straight to those cherished campfire gatherings.

    The beauty of brewing your own Campfire Stout lies not only in reaping the rewards of a lovingly crafted beer but also in the opportunity to reminisce about the simple joys of life. With each batch, you invite friends and family to share in the experience, fostering connections while savoring this remarkable stout. The perfect combination of nostalgia and flavor comes alive in this brew, ensuring that it will quickly become a staple in your homebrewing repertoire. Embrace the art of brewing and let the allure of Campfire Stout inspire your next fermentation adventure.

    Ingredients: The Components of Your Campfire Dream

    Creating a Campfire Stout requires a careful selection of ingredients, each contributing uniquely to the overall flavor profile. One of the primary components is 6 lbs of dark dried malt extract (DME). This ingredient serves as the backbone of the stout, imparting a profound depth and robust character that defines the base of the beer. Dark DME is instrumental in providing the stout’s rich and malty flavor, which is essential for any quality brewing experience.

    Next, we have 8 oz of chocolate malt, a key player in achieving the distinct chocolatey notes that characterize the Campfire Stout. This specialty grain introduces an elegant layer of sweetness with roasted notes, which pairs harmoniously with the malt extract. The chocolate malt not only enhances the color of the stout, giving it that enticing dark hue but also contributes to the silky mouthfeel that many enthusiasts crave.

    The intriguing addition of 4 oz of graham cracker crumbs brings a nostalgic flavor reminiscent of campfire s’mores to the brew. This ingredient subtly infuses a mildly sweet and crunchy profile, complementing the chocolate malt perfectly. Additionally, the 4 oz of marshmallow fluff provides a unique touch, lending a creamy sweetness during the secondary fermentation. This fluff contributes to the soft, smooth finish of the stout, evoking memories of warm summer nights around the campfire.

    To round off the ingredients, we utilize 1 oz of Fuggle hops, which perform the essential function of balancing the sweetness derived from the malts and other adjuncts. The earthy and herbal qualities of Fuggle offer a gentle bitterness, curbing the potential for the stout to become overly sweet. Lastly, S-04 yeast is an excellent choice for fermentation, known for its ability to produce a clean finish while enhancing the overall complexity of flavors. These components combined ensure your Campfire Stout is both complex and utterly delightful, setting the stage for a memorable brewing experience.

    Brewing Process: Crafting Your Smoky Stout

    The process of brewing Campfire Stout begins with assembling the necessary ingredients and equipment. It is essential to prepare all your materials ahead of time to ensure a smooth brewing experience. Start by heating a sufficient amount of water for the mash, typically around 160°F. Once the water reaches the desired temperature, add the crushed grains to create a mash. The combination of malted barley, roasted barley, and any specialty grains will lend the stout its characteristic flavors.

    After mashing for approximately 60 minutes, it is crucial to proceed with the boiling phase. The grains are then rinsed, and the sweet wort is collected. Bring the wort to a vigorous boil, being careful to monitor for boil-overs. During this 60-minute boil, you will incorporate hops for bitterness and aroma. For a well-balanced flavor, consider adding hops at various stages: early in the boil for bitterness and later for aromatic qualities. The choice of hops used significantly influences the final outcome of the stout, contributing to its distinguished profile.

    Following the boil, it is essential to rapidly cool the wort to around 65°F before transferring it to a sanitized fermentation vessel. Yeast is then pitched, initiating the fermentation process which should last about two weeks. A consistent fermenting temperature is vital for producing a clean, flavorful stout.

    To achieve the desired flavor complexity, five days into fermentation, carefully add graham cracker crumbs and marshmallow fluff. These unique ingredients are critical for imitating the essence of s’mores while enhancing the chocolatey notes of the stout. Maintain a patient approach throughout the brewing journey, as the time spent nurturing your brew directly impacts the final product. Once fermentation is complete, you will have created a bold and cozy Campfire Stout—a perfect reflection of your brewing dedication.

    Sip, Share, and Enjoy Your Campfire Stout!

    As we reach the end of our journey exploring the delightful world of Campfire Stout, we invite you to take the plunge into brewing this unique and flavorful beer. The smoky, chocolatey dream that is Campfire Stout offers an unparalleled experience, combining the essence of a cozy campfire with the sweetness of s’mores. With its rich flavors and inviting aroma, this stout is not just a drink; it’s an experience worth savoring.

    We encourage you to gather your brewing equipment and give this recipe a try. Immerse yourself in the process, and witness how the combination of ingredients transforms into a delectable stout that perfectly encapsulates the spirit of campfire gatherings. Don’t forget to document your brewing adventure! Share your experiences and photos with our community. We would love to hear how your Campfire Stout turns out and if you’ve added any personal twists to the recipe.

    Engage with us by leaving comments on our blog. Your stories and feedback not only enhance our community but also inspire fellow brewers to embark on their own chocolate stout adventures. Remember, each sip brings you closer to the warm, nostalgic feeling of summers spent around a fire, making this stout an excellent choice for both casual drinkers and seasoned enthusiasts alike.

    So gather your friends, pour yourselves a glass, and enjoy the flavors of your very own Campfire Stout. Here’s to the smoky and chocolatey delights that await you in every pint. Cheers to your next homebrew hit and the wonderful experiences that come with sharing it!

  • Whiskey Ginger Ale

    Whiskey Ginger Ale

    a person holding a mug of beer in a park

    Introduction: A Flavor Heist Awaits

    Embarking on the quest to brew your own Ginger Whiskey Amber Ale is akin to planning an exhilarating flavor heist. Picture this: the fiery kick of ginger awakening your senses, combined with the sultry embrace of whiskey, all nestled within the warm, comforting richness of amber malt. This is not just any beer; it’s an adventure that promises to captivate both your palate and imagination.

    Imagine sipping on a glass of this delightful concoction as the sun sets against the horizon, casting a golden hue that is nothing short of a “sunset on steroids.” Each gulp is a heady mix of taste and sensation, striking the perfect balance between spicy and smooth, making it a true standout in the world of homebrewing. With its tantalizing aroma wafting through the air, every moment spent crafting this ale becomes a celebration of creativity and flavor.

    The ginger brings a bold, zesty flair that invigorates the senses, while the whiskey adds a layer of depth—think of it as the smooth-talking legend at a party, luring everyone closer with its charm. Meanwhile, the rich malt base ensures that the drink is as satisfying as it is complex, providing a foundation that allows each ingredient to shine without overpowering the others. This unique flavor profile beckons beer enthusiasts and casual drinkers alike, inviting them to share in an experience that transcends the ordinary.

    Crafting Ginger Whiskey Amber Ale is more than just following a recipe; it’s about unleashing creativity and exploring the wild interplay of flavors that will leave a lasting impression. Whether you are an experienced brewer or a novice looking to embark on a new culinary adventure, this drink is sure to ignite passion and inspire endless exploration in the world of homebrewing.

    Ingredients: The Building Blocks of Flavor

    Creating a truly exceptional Ginger Whiskey Amber Ale requires a careful selection of ingredients that contribute to its unique flavor profile. The foundation of this brew lies in 6 lbs of amber Dry Malt Extract (DME). The amber DME serves as the backbone of the ale, providing a rich caramel sweetness and a satisfying body that defines the character of the beer. This ingredient not only influences the taste but also aids in achieving the desired amber coloring, making it visually appealing.

    To enhance the beer’s complexity, 1 oz of Cascade hops is incorporated as well. Known for its floral and citrus notes, Cascade hops impart a subtle hoppy balance to the ale without overwhelming the other flavors. The inclusion of hops is vital in creating a well-rounded profile that complements the spice from the ginger and the warmth from the whiskey, resulting in a harmonious blend.

    Arguably, the most distinctive feature of this ale is the introduction of 4 oz of grated ginger root. This spice kick is what sets the Ginger Whiskey Amber Ale apart from more conventional brews. The freshly grated ginger adds a lively zing, enhancing both the aroma and the taste. Its spiciness pairs beautifully with the malty sweetness while also offering a refreshing quality that invigorates the palate.

    Finally, during the secondary fermentation, an intriguing twist is introduced with the addition of 4 oz of whiskey. This unique ingredient elevates the flavor complexity, lending a smooth warmth and depth to the ale. The whiskey blends seamlessly with the other components, enriching the overall experience without overpowering the primary flavors of ginger and malt. Together, these ingredients come together to create a well-balanced and delightful brew, ideal for both novice and experienced homebrewers alike.

    Brewing Process: Crafting Your Masterpiece

    Brewing Ginger Whiskey Amber Ale is an art that requires attention to detail and a keen sense of timing. The process begins with the selection of high-quality ingredients. Start by gathering your base malt, specialty malts, hops, ginger, and whiskey. The base malt is essential, as it provides the fundamental flavor and body for your ale. Specialty malts, such as caramel or crystal malts, will add complexity and a rich amber color. Choosing the right hops is also crucial, as they balance the sweetness of the malt and the spiciness from ginger.

    The brewing process traditionally begins with mashing the grains. Combine the crushed malts with hot water, allowing the enzymes to convert starches into fermentable sugars. Maintain the mash temperature between 152°F to 158°F for approximately 60 minutes. Once mashed, sparge the grains to extract all their sugars. The next step is the 60-minute boil; this is crucial for both flavor development and sterilization. Add your hops in stages during the boil: the initial addition provides bitterness, while later additions are for aroma and flavor enhancements.

    Thermal control during fermentation is vital for achieving the desired flavor profile. After the boil, cool the wort rapidly to about 68°F before transferring it to the fermentation vessel. Pitch the yeast and keep the temperature steady; maintaining this temperature prevents off-flavors from developing. Herein lies the key to optimal flavor extraction: the ethanol concentration allows for a perfect fusion of ginger and whiskey with the ale. Timing is everything; introduce freshly grated ginger and a splash of whiskey about five days into the fermentation process. This timing ensures maximum flavor impact without overwhelming the ale.

    After roughly two weeks, check the specific gravity to confirm fermentation has completed. When your Ginger Whiskey Amber Ale is ready, carefully siphon it into bottles, carbonate appropriately, and allow it to condition. The meticulous attention to detail during each step of this process will empower homebrewers to create a unique brew that embodies a spicy, smooth character perfect for any occasion.

    The Final Sip: Taste the Adventure & Join the Community

    The Ginger Whiskey Amber Ale is not merely a beverage; it is a remarkable fusion of flavors that captivates the palate and invites brewers into a world of adventure and creativity. With its unique blend of spicy ginger notes and the warmth of whiskey, this amber ale offers a delightful drinking experience that balances sweetness and tang. The deep amber hue coupled with its foamy head creates a visual treat that beckons enthusiasts to take that first sip, experience the aroma, and indulge in its robust flavors. Each batch brewed unveils a different character, making every sip an exploration of culinary artistry.

    As you embark on this brewing journey, know that you are not alone. The world of homebrewing is filled with passionate individuals eager to share their experiences, tips, and tricks. This community thrives on collaboration and the exchange of ideas. By creating your own Ginger Whiskey Amber Ale, you have the opportunity to not just challenge your brewing skills, but also to contribute to our communal love for flavorful beers. Engage actively by sharing images of your uniquely crafted brews, offering insights into your brewing process, and discussing variations you tried; these contributions will undoubtedly inspire others.

    A call to action goes out to all aspiring brewers: take the plunge and experiment with your own rendition of this spicy amber ale. Whether you prefer a traditional take or want to add your personal twist, your brewing journey can ignite dialogue, collaboration, and newfound friendships. The path of brewing is about experimenting, tasting, and celebrating the diversity of flavors. Join us in this exciting endeavor and become part of a vibrant community where each bottle tells a story, and each gathering is an opportunity to share the love of creativity in beer making.